C#
Better C# Switch Statements for a Range of Values
By hackajob Staff
You asked for more Python tutorials and we've listened. As Python consistently stays as one of the most popular programming languages globally, it's no wonder why so many tech companies are hiring for Python Developers. So what better way to get started than building a Python Flask app?
We'll be using Flask and Django to build our app so let's get better acquainted with them: Flask is a Python framework that is used to build web applications. It provides the necessary classes to create a web application, whilst Django is the server that runs our web application built on Flask.
Now that we know what technology we going to use, let's see what we are going to build. We'll use the API from Rapid API to translate a text to the language selected. This is something we might do with our phones currently at the ease of a button, but it's so much cooler being able to do this for ourselves.
Our application allows users to enter the text in English and then select the desired language to translate to. Once translated we display the translation. While this application is straightforward, it gives a head start to understanding how Flask and Django work.
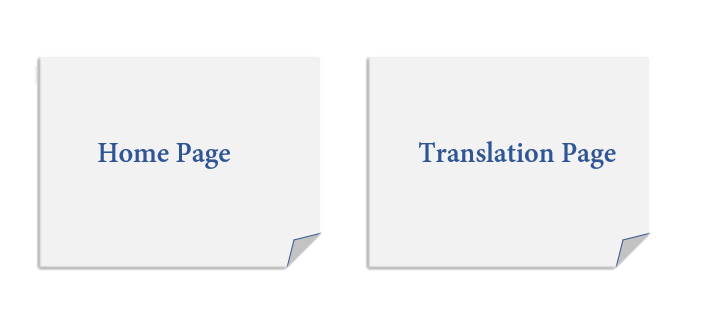
Before we see the actual Python and HTML code, let's see how our Flask app works.
Our application will have 2 pages: home.html and languagetranslate.html. HTML pages in Django are usually referred to as templates as they tend to store the HTML structure of any page.
We're using the Translation API from Rapid API. It's a free API to use. All you need is to subscribe to this API. You can find it here: Language-Translator API Documentation (karthikhosur15) | RapidAPI
Now, our app opens with the Home Page. Home Page is just a welcome page that navigates us to the Translation Page. From there we'll send the text to the Translation API and then finally, display the translation on the same Translate page.
The final application looks like this

Django is available as a Python package to be installed via PIP. We recommend using any Python version that is above 3.5, for ease of use. Run the below command in the Command Prompt or the Shell to install the Django:
pip install Django
This will install the Django server on your machine. Once installed, you are ready to move to the fun part!
So now we've had all of the background and we know what we're going to create ... let's create our app! Run the below command in your desired directory
django-admin startproject pythonapp
In the above command pythonapp is the name of the project. You can name it anything you want. Once the project has been created open the page in your favourite text editor. You'll have a directory structure something like:
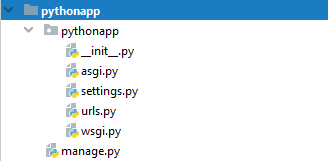
In the above structure, we need to change the settings.py and urls.py files to have our application. We'll also need to create a new file called view.py.
Locate the Template key and in the Dirs, key add the template so that it looks like this:
'DIRS': ["templates"],
Be careful when modifying this file.
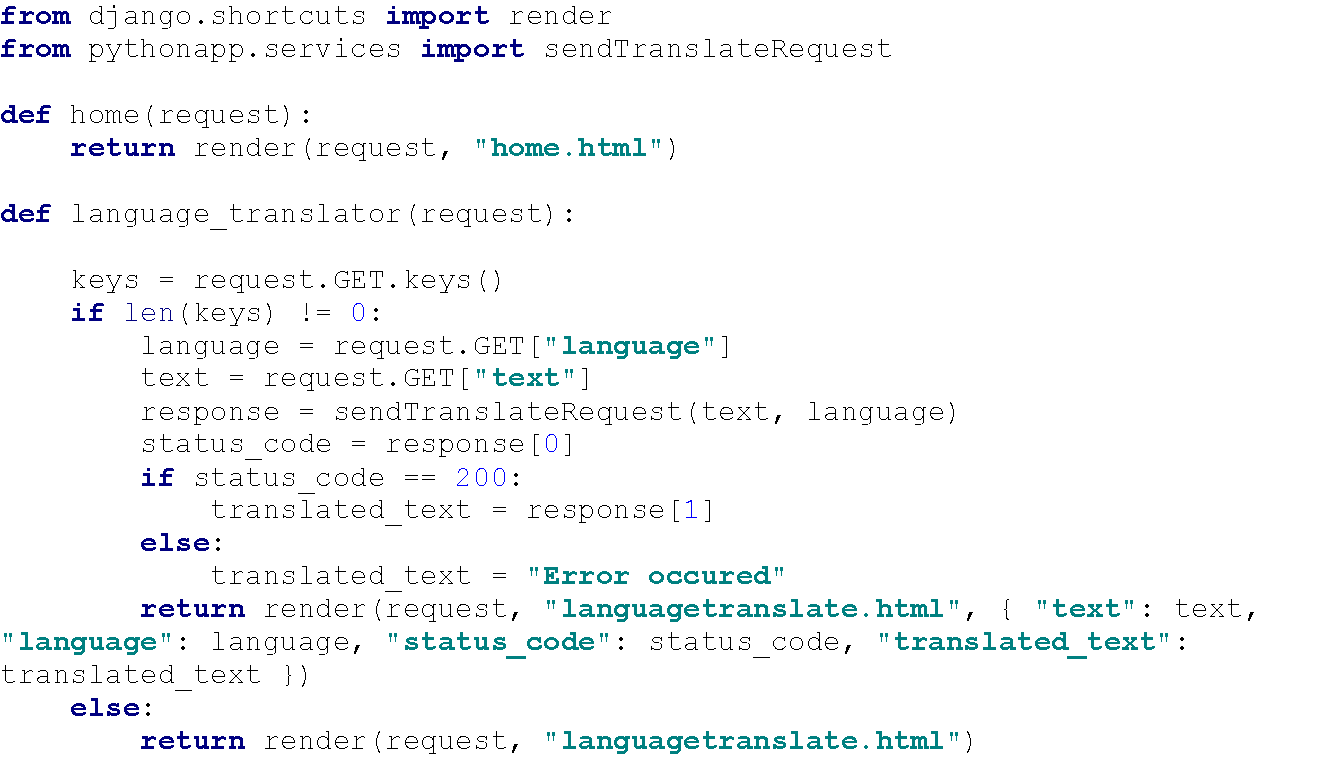
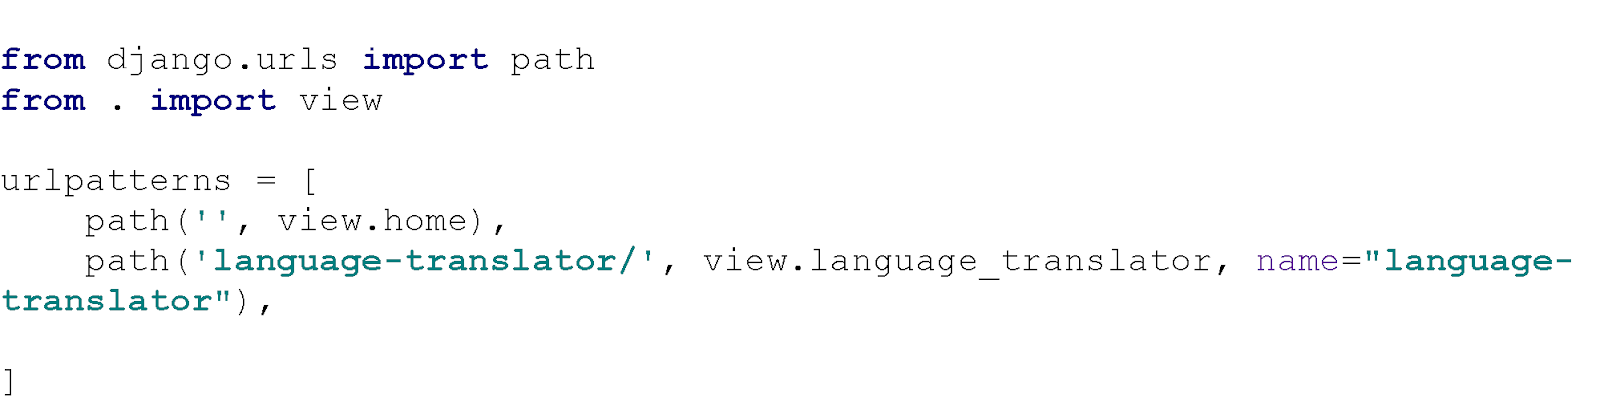
We need to make changes to the urls.py file. Modify it as below
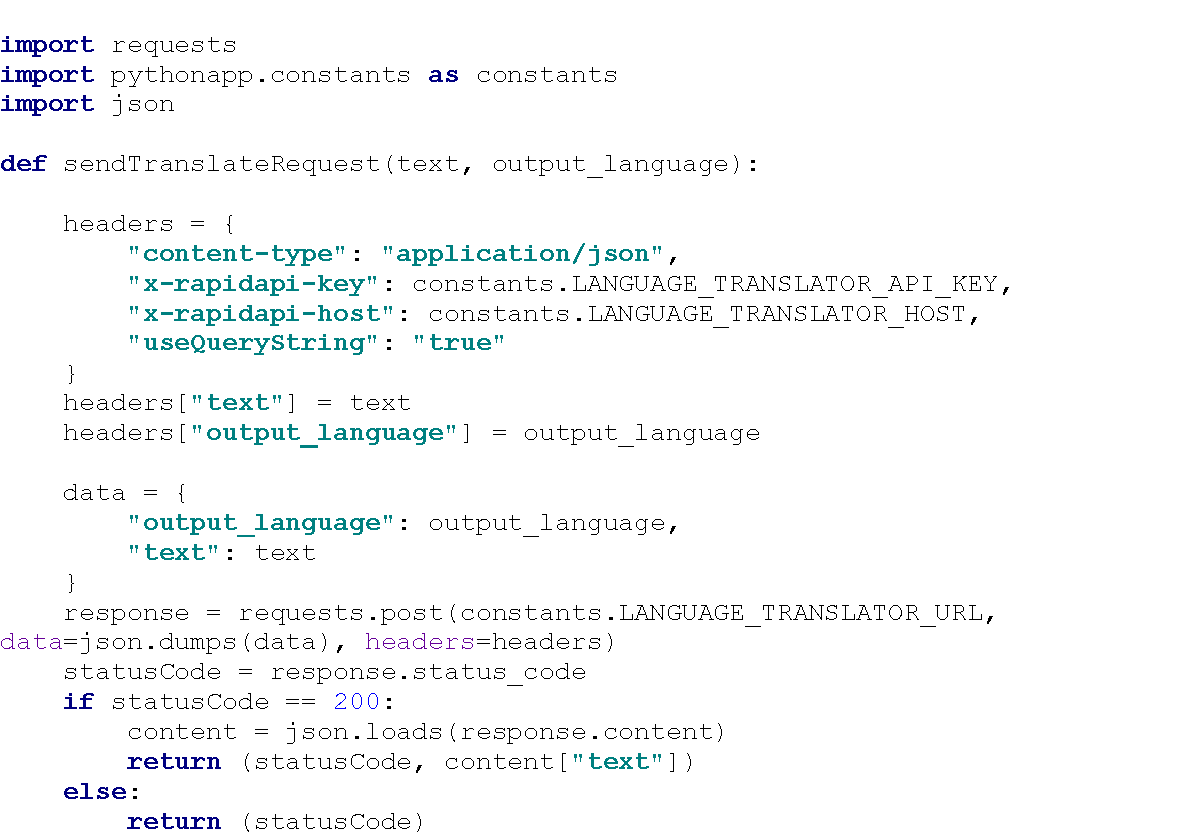
Creating constants.py and service.py files in the directory where urls.py and settings.py files are present create two new Python files: constants.py and services.py. Add the below content in the constants.py file:

You'll get the API key from the Rapid API. It is different for each user. Copy the API key and paste it here.
In the services.py file add the below code:
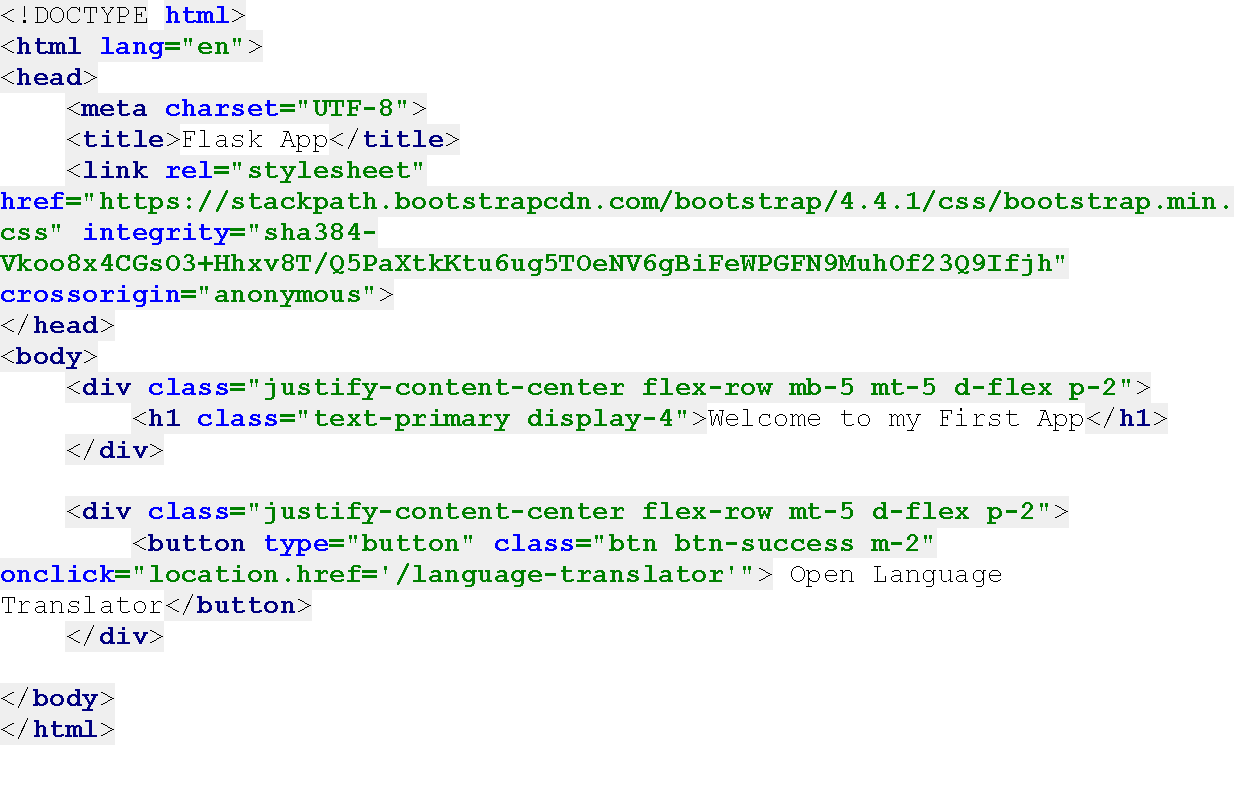
In your application structure root, create a new folder called “templates”. This is the template we had mentioned in the setting.py folder. Inside this template folder, create two new files home.html and languagetranslate.html. In the home.html file add the below content
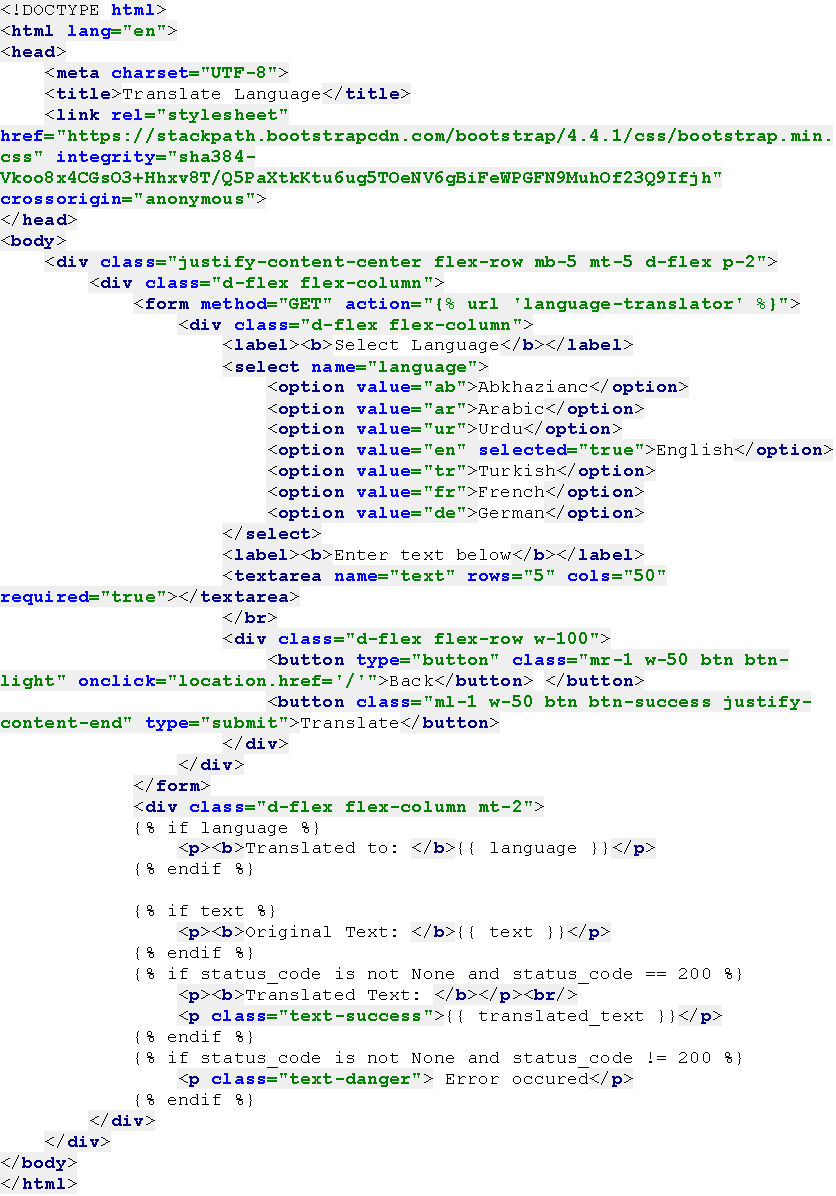
And in the languagetranslator.html file add the below content
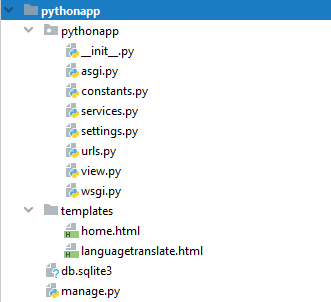
Final Directory Structure
Your final directory structure should look something like this:
So let's summarise all of the code above after we installed the Python Django server:
The urlpatterns also accepts the HTML template and the URL name. If we reference our URLs by URL name, then we are free to change the URL without needing to check for them in the app.
Now the fun part, it’s the time to run your application. In your terminal run the below command:
python manage.py runserver
Then open your web browser and type the URL: http://localhost:8000/
You should see your shining Flask application. Ta da!
Now that you know how Django works, along with some special syntax and templates, it’s time to build more sophisticated applications. Ready to make this next step? Well, check back soon as we go through how to build API in Django, Database operations (since nearly every web application requires it), and how to work with migrations.
Like what you've read or want more like this? Let us know! Email us here or DM us: Twitter, LinkedIn, Facebook, we'd love to hear from you.