C#
Better C# Switch Statements for a Range of Values
By hackajob Staff
Django is an open-source web framework for developing applications using Model-Template-View (MTV) Architecture. Django Rest Framework (DRF) was built upon Django to create a tool in order to build RESTful APIs using Python.

In today’s tutorial, you’ll be learning how to deploy a RESTful application with CRUD endpoints. It’s important to remember that DRF was built upon Django, so you’ll need to start by creating a Django application.
Create a folder called ‘quotes’ where your source code will go. Navigate into the folder, then create and activate a virtual Python environment using the following commands in the terminal (note that you can call your environment your preferred name and not just ‘env’):

Install Django in the environment using ‘pip install django’
Once Django is installed you can create your application, otherwise known as a project. Note that a project is the whole application and is broken down into different apps, which are essentially independent components of the project. For example, if the ‘quotes’ project requires authentication, you’d need to have an app called ‘authentication’ as well as the core app for posting and fetching quotes.
Initiate the Django project using the following command:

Remember the ‘.’ at the end of the command. At hackajob, we prefer to use this approach because it creates the project inside of the current folder instead of creating a new one. Find the latest project structure below:
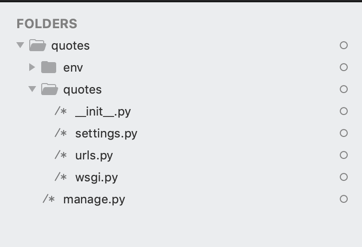
If you didn’t put the ‘.’ at the end of the command, the ‘env’ and ‘quotes’ subfolders would end up inside another folder called ‘quotes’, meaning that the path for the ‘settings.py’ file would be ‘~/quotes/quotes/quotes/settings.py’. This approach is pretty unclean which is why we prefer to add the ‘.’ argument.
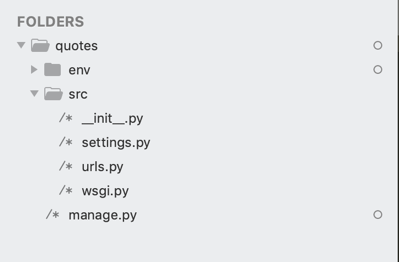
The ‘settings’, ‘urls’, and ‘wsgi files’ contain the code for the project. The current path to these files would be ‘~/quotes/quotes/…’ It’s still not the nicest of structures, which is why we recommend renaming the second ‘quotes’ folder to ‘src’:
This approach is far less confusing than having two quotes folders. Next, it’s time to try running your Django application by using the following command:

You should get the following error with this traceback:
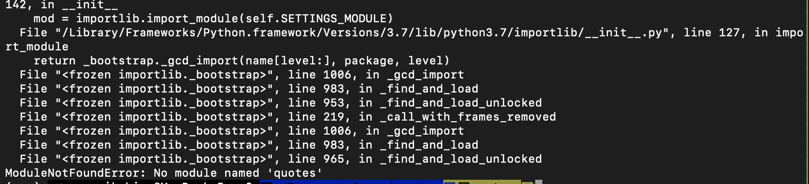
This error is to be expected given that when you initiated the project, it knew the core files (such as ‘settings’, ‘urls’ and ‘wsgi’) could be located in a folder titled ‘quotes’. To fix this, simply open the file ‘manage.py’ in your code editor:
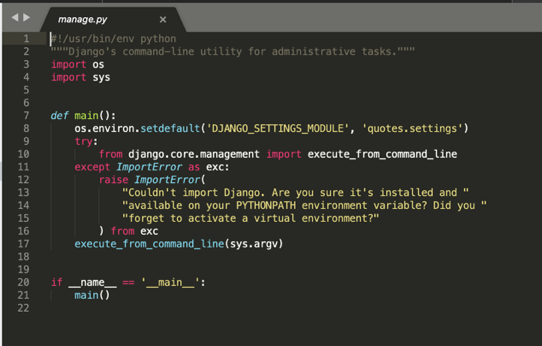
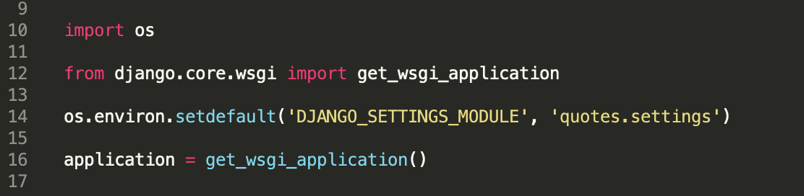
Take note of line 8, as the argument ‘quotes.settings’ is the source of the error. Change this to ‘src.settings’ and do the same for anywhere else this module was referenced in the ‘settings’ and ‘wsgi’ files:
Once the above error is fixed, your development server should run like so:

Go ahead and run the following commands to create tables in your default SQLite database:

The first command creates migration files, which are used by the second command to create tables in the database. Because you haven’t made any changes to the boiler plate, the first command will return ‘No changes detected’.
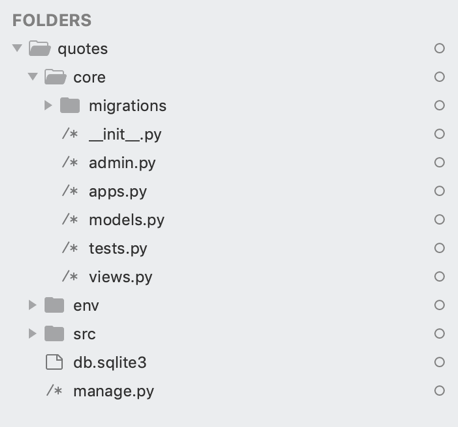
Set up your ‘quotes’ app using the following command:

We chose to call the app ‘core’ instead of ‘quotes’ so that we'd avoid having multiple folders with the same name, which could end up being pretty confusing. Below is a snapshot of how your current folder structure should look:
Create your first model in the 'models.py' file located in the core folder:
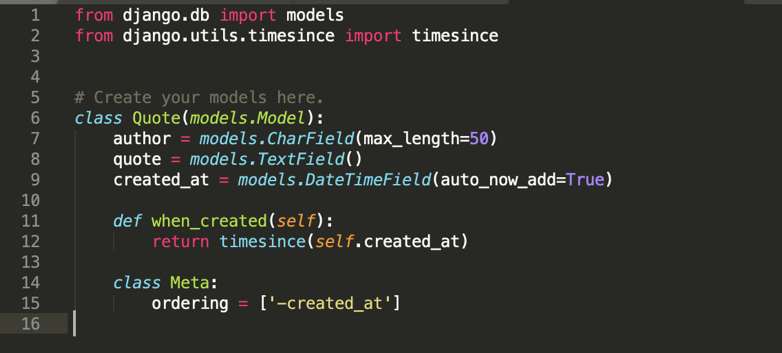
It's best practise to name Django models using singular names hence ‘Quote’ and not ‘Quotes’ in the example above. The model class ‘Quote’ is what the ORM will use to create a table in the database, as well as map data from your application to each table column.
From the above example, your ‘Quote’ table will have four columns in the database, including ‘author’, ‘quote’ and ‘created_at’. The first column will be a character field that shouldn’t exceed 50 characters. Since you haven’t given an argument for the ‘blank’, Django automatically makes the column ‘blank=True’. Because of this, you’ll be expected to provide an author each time you create a row in the database.
Additionally, please note that there isn’t an argument for ‘null’ in the column. Django recommends not using ‘null=True’ for string fields as this gives the possibility of empty values being stored as either ‘blank’ or ‘none’ in the database. One exception is when a character field has both the ‘unique=True’ and ‘blank=True’ sets. In this situation, ‘null=True’ is required to avoid unique constraint violations when saving multiple objects with blank values.
The quote column in the database is a text field and you also have an extra column called ‘created_at’. The value for this column will be automatically stored on creation of a new row entry, hence the argument ‘auto_now_add=True’.
The method ‘when_created’ is a nice addition to have, as it allows you to calculate when a quote was created from the day you query it. For example, instead of getting the date and time stored in the database, you could receive something like ‘4 days 10 hours ago’.
The ‘Meta’ class ensures that when we query this table, the results are ordered based on the ‘created_at’ column. In this case, the ‘-’ tells Django to order them from the latest. Next, go ahead and run ‘makemigrations’, then migrate them as described earlier.
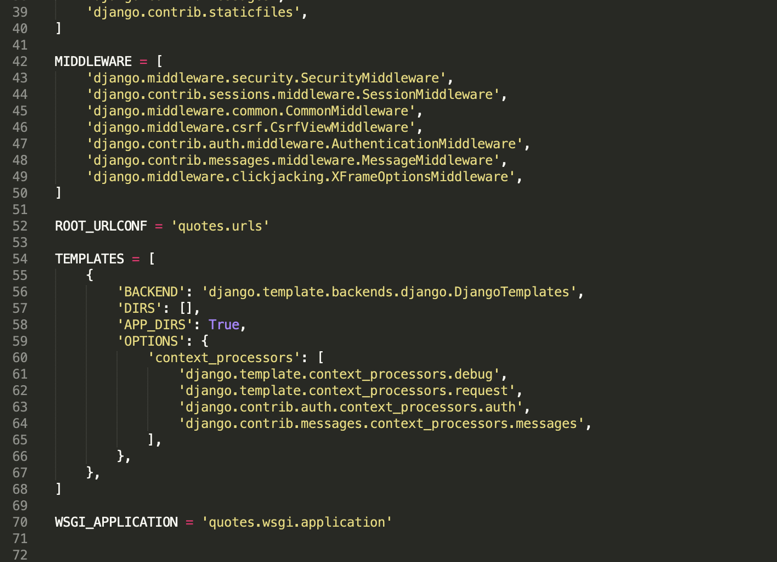
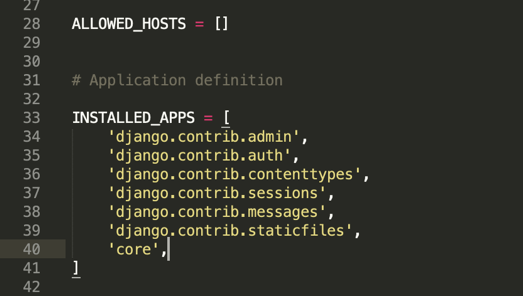
If you run ‘makemigrations’ it’ll return the phrase ‘no changes detected’, however this isn’t true since you’ve just added a new problem. But what's the issue? Django runs migrations on registered apps and if you’ve been following the steps so far, you’ve only created your app and not registered it with the main project. To fix this, add it to the ‘settings.py’ as shown below in line 40:
If you run ‘makemigrations’ again, you should get the following:

Then run 'migrate' to create this table in the database:

You’ll need to check whether your model works before you move to other components of the architecture. We recommend this approach because it allows you to build each of the components independently, which could come in handy if you have to switch from a RESTful API to a GraphQL one as an example.
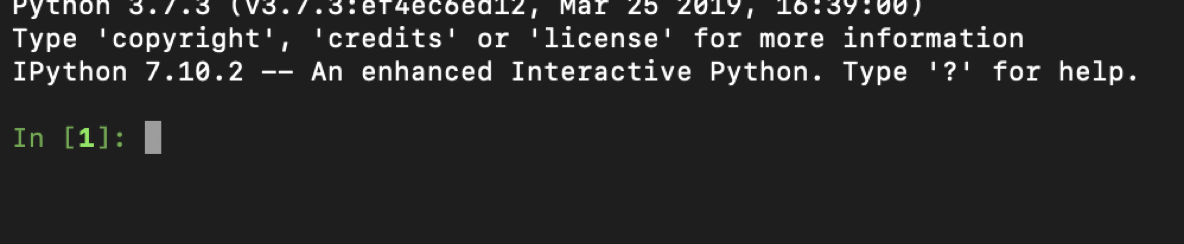
To run this check, you’ll be using Django shell and to make it more interactive, we recommend installing ‘ipython’ using ‘pip’ in your environment:

The command above should give you the following result:
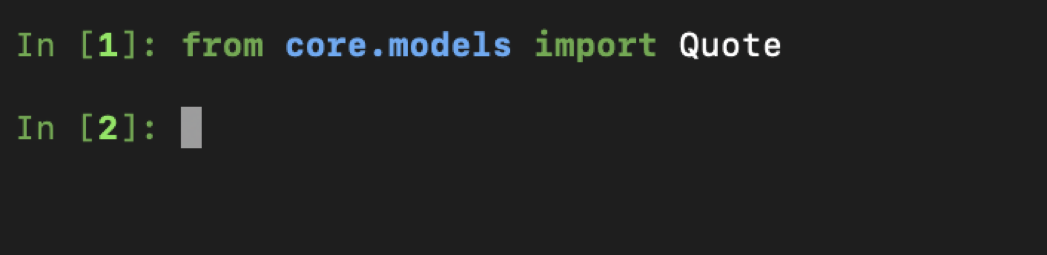
Now import your model into the shell like so:
Create your first item as follows:

Then take a look and see whether the item has been created and contains all the attributes required:
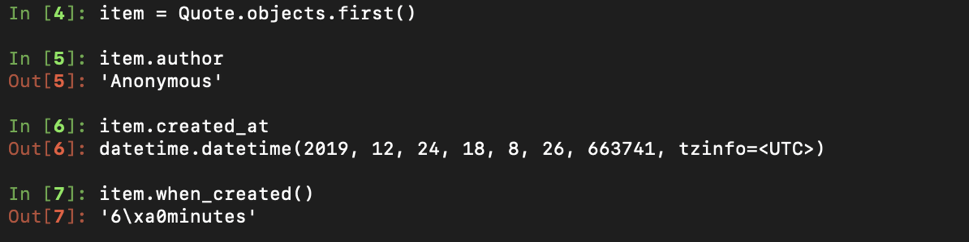
You should now be able to proceed with creating CRUD endpoints for this model. So far, you would’ve only created the application and not the API, meaning that it’s time to install the Django Rest Framework (DRF). Sometimes, learners new to Django tend to confuse which part of the application belongs to which bit. Install DRF using the following command:

In the core folder, create a file called ‘serializers.py’, which will contain serializers. According to the DRF documentation, the following quote explains what serializers are used for:
“Serializers allow complex data such as querysets and model instances to be converted to native Python datatypes that can then be easily rendered into JSON, XML or other content types. Serializers also provide deserialization, allowing parsed data to be converted back into complex types, after first validating the incoming data.”
This is how your serializer should look:
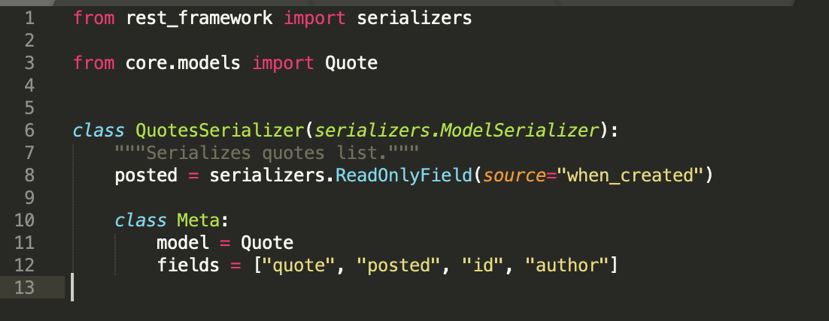
Line 8 highlights a field that we expect to be displayed in fetch endpoints despite the fact that it isn’t a column in the ‘Quotes’ table.
Line 11 specifies the model and the fields you intend to serialize, (which should always be an ‘iterable’) and states the specific columns you wish to be displayed in the JSON output.
You’ll then move on and use DRF’s generics to see how easy it is to deploy simple endpoints using this framework. In your ‘views.py’, make an endpoint for creating ‘Quotes’:
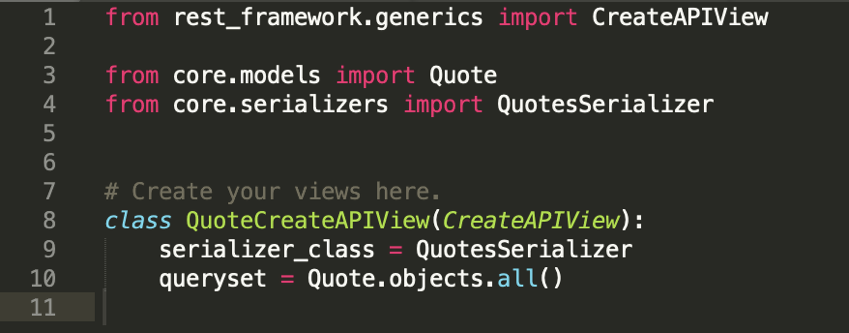
When using generics, you can create an endpoint by simply defining both the ‘serializer_class’ and ‘queryset’.
Create a URL for this view. Make a ‘urls.py’ file in the core folder and then add the following code:
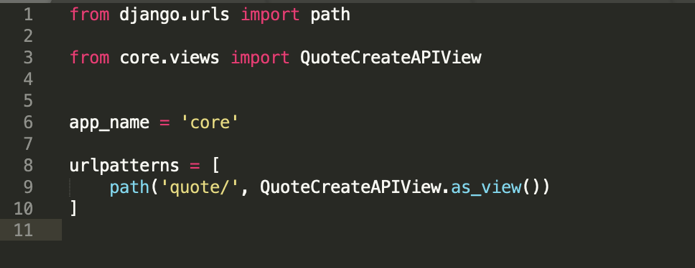
Line 9 tells the app that the path for this endpoint will be ‘http://[servername]/quote/’.
You’re almost there. All you need to do now is tell the main project that it should include URLs in the app’s routes. You can do this by adding the following to the ‘urls.py’ file in the ‘src’ folder:
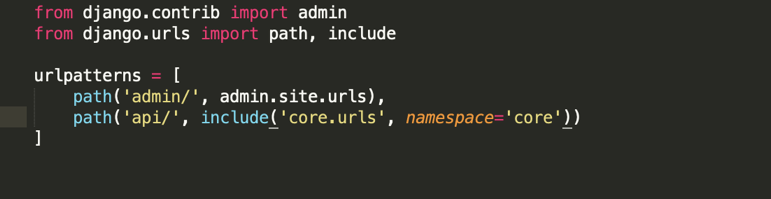
Please note that this changes the endpoint path to ‘http://[servername]/api/quote/’. This is because all URLs for the core app will have the ‘api/’ suffix before the specific endpoint path.
Run the server using ‘python manage.py runserver’ to see if the API works. Once the server is up, try accessing the endpoint as shown below:
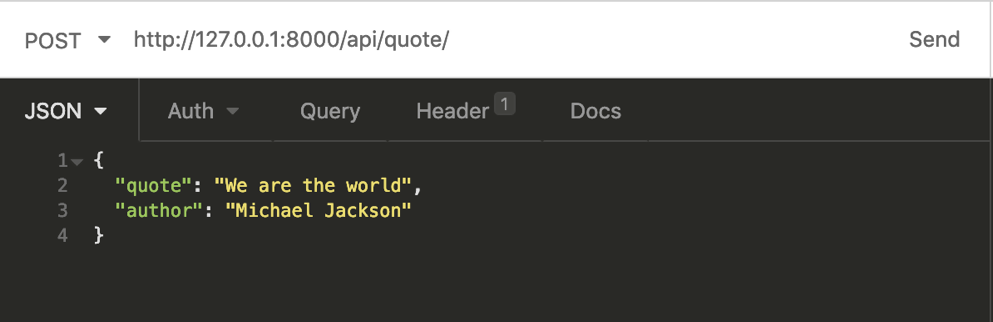
You should receive the following data after hitting the endpoint:
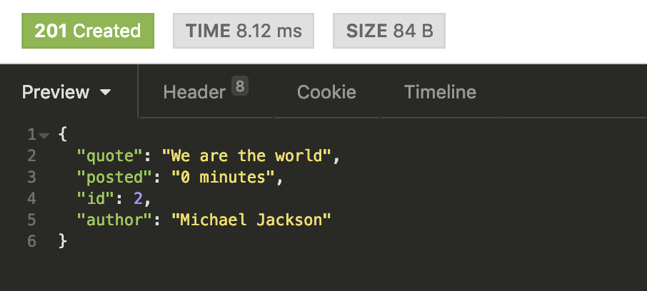
Hopefully you can see how the serializer comes in handy and helps to set the fields that you get to see.
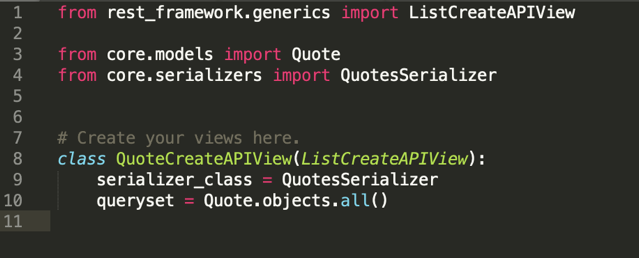
Next, create an endpoint for checking all the quotes in the database. You can do this by modifying your view and changing the ‘CreateAPIView’ to ‘ListCreateAPIView’ as shown below:
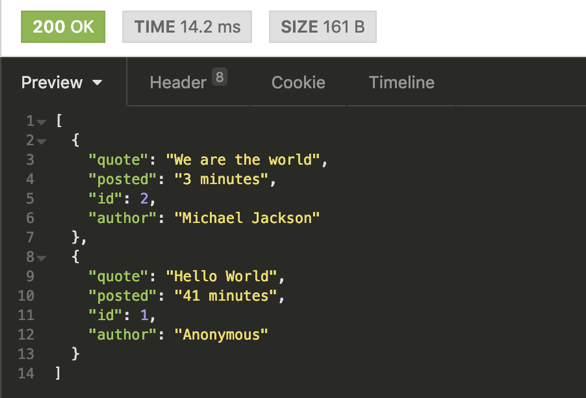
Now try accessing the same endpoint using a ‘Get’ method. You’ll receive the following data:
Create an endpoint for fetching a specific ‘quote’, updating a ‘quote’, and deleting a ‘quote’. The beauty of DRF generics is that this can be done with just a few lines of code. Your ‘views.py’ should now look like so:

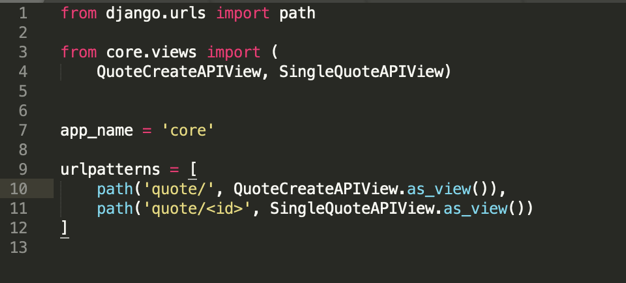
As you can see, you’ll be reusing the same serializer for this endpoint and the only new thing that’s been added is the ‘lookup_field’ which will act as the parameter you pass in your endpoint. Make a URL for this endpoint:
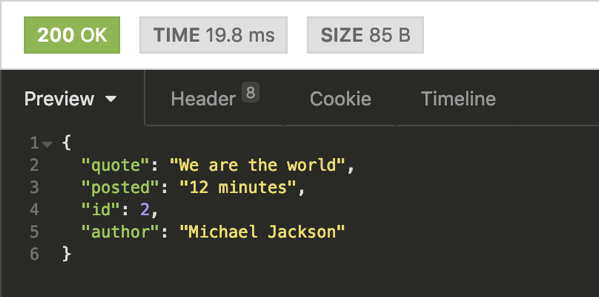
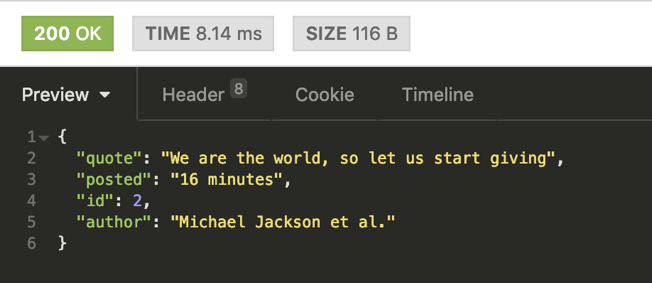
Try accessing the above endpoint and see if you can perform a ‘RUD’. As an example, why not try querying the ‘quote’ using ‘id 2’:

This is what you should see:
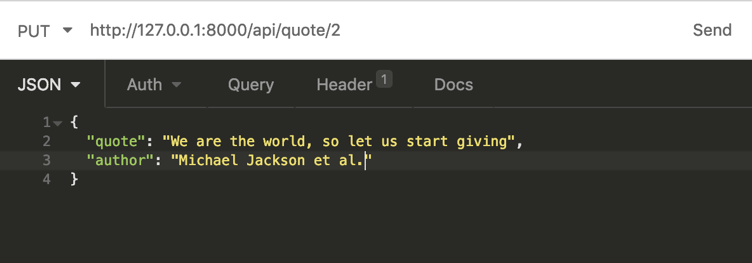
Now update the ‘quote’ and 'author' by using a ‘PUT’ method:
You should see the following:
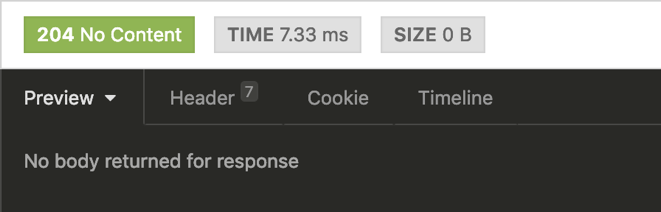
Finally, delete the following quote:

You should see this:
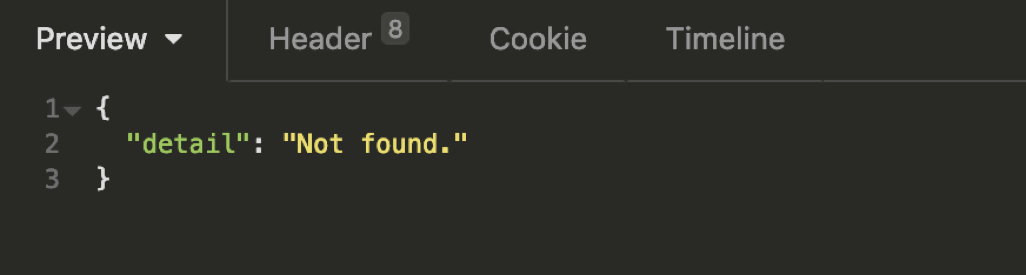
If you try and fetch the quote using a ‘GET’ method, you’ll see the following response:
Well done, you've made it to the end of this tutorial! You’ve created a RESTful application with CRUD endpoints and can now continue experimenting and adding more endpoints and apps as you wish.
Got any questions? Make sure to reach out to us via Twitter.
Happy coding!